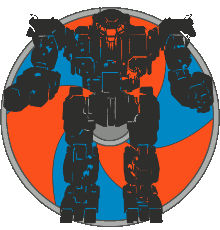

Bushwacker
The Bushwacker is one of the best IS mediums, focusing on ballistics and sometimes missiles. It has great hitboxes for spreading damage and shielding, with a smattering of durability quirks.
The Bushwacker's narrow frontal profile means that XL engines are great with mid-ranged builds, and you get torso hardpoints with reasonable mount height and generally perfect convergence. At closer ranges, the side torsos are very vulnerable, so position carefully so that you can always face front to enemy at range and don't equip XL on brawl builds. Over-twisting and exposing your STs can do more harm than good, so use aggressive nose-wiggling to spread damage. When you lose a side torso, you should show that side completely to the the enemy by twisting all the way - the large side profile will tank damage and effectively shield your good side while minimizing CT damage.
The Bushwacker performs best with torso ballistic loadouts. The arms tend to fall off, so builds relying on them are a little bit weaker. Missile builds will add large conspicuous missile pods to the torsos, making the mech more fragile and significantly hurting the performance of those builds.
| Variants | LA | LT | CT | RT | RA | HD | JJs | MASC | MaxEng | Accel | Twist | Pitch |
|---|---|---|---|---|---|---|---|---|---|---|---|---|
|
| 2 | 11 | 1 | 2 | 1 | 0 | FALSE | 360 | 27.0 kph/s | 110o @ 94.5o/s | 30o | |
|
| 1 | 12 | 2 | 1 | 1 | 0 | FALSE | 360 | 33.9 kph/s | 110o @ 108.0o/s | 30o | |
|
| 2 | 2 | 2 | 1 | 0 | FALSE | 360 | 27.0 kph/s | 110o @ 94.5o/s | 30o | ||
|
| 2 | 2 | 1 | 2 | 1 | 0 | FALSE | 360 | 27.0 kph/s | 110o @ 94.5o/s | 30o | |
|
| 1 | 11 | 2 | 1 | 2 | 0 | FALSE | 360 | 27.0 kph/s | 110o @ 94.5o/s | 30o | |
|
| 3 | 11 | 1 | 1 | 1 | 0 | FALSE | 360 | 27.0 kph/s | 110o @ 94.5o/s | 30o |
BSW-X1/X2/P2/HR
There are a couple builds which can be played on any of these listed variants. Sometimes quirks makes one variant the de facto best, but not by a significant margin.
Considered the best Bushwacker build - this has good burst, good sustain, and doesn't need too much facetime. Requires XL, which is a bit risky as this build often ends up at closer ranges, but if played carefully you will be rewarded.
All listed variants have near identical quirks, and this build is equally effective on each of them. (The BSW-X1 has a nice range quirk, but UAC10 accuracy at those ranges is dubious anyways)
This build is technically best on the BSW-X2 for its higher agility, but it can be played on any of these variants. The STD engine means you can and should tank aggressively with your dead side at all times.
BSW-P1
More hardpoints than it can realistically use for most builds. A flexible missile variant, but most of the solid builds run well on other chassis.
Nasty brawler with high burst DPS. SRM2s still add extra hitbox geometry to the STs, but not nearly as much as SRM4s and 6s.
BSW-P2
Ballistic and laser variant, with viable close and mid-range builds, but not an especially strong variant. Trading and brawl builds are available.
Okay DPS with pinpoint volleys. Unlike dual LB10, this requires XL, but the pinpoint nature allows you to engage at farther ranges, even 400m and beyond where UAC10 volleys tends to spread too much.
This build is the same on the BSW-X2.
Precise brawler, if a bit warm. Raw alpha or DPS aren't impressive, but with careful pinpoint aim it can be surgical.
This build can also be done on the High Roller.
Closest thing we have to a laservomit Bushwacker - this is one of the only builds that can truly trade/poke. While the Bushwacker has a good frontal profile for trading, remember the XL and explosive gauss are especially vulnerable from flanking fire compared to other medium mechs.
A left-sided version of this build can be done on the High Roller.
While not the most impressive alpha size, the HGauss still guarantees a large chunk of damage always goes to one spot. Twist aggressively when not firing and abuse the Bushwacker's large side profile as a shield, since you're forced to take the STD engine.
This build can also be done on the High Roller, left-sided.
Okay DPS with bonus crit damage. Unlike dual AC10, this doesn't necessarily require XL, so you can brawl somewhat freely.
This build is the same on the BSW-X2.
BSW-S2
The S2 has the worst hardpoints and no quirks, so there is zero reason to play it unless you use it for the dual AMS, and even the dual AMS builds have major problems.
"zombie" but don't get halved lol
BSW-X1
The X1 is best for massed ballistics, with its hardpoints grouped high and tight in the side torsos.
Offers the greatest RAC DPS you can achieve on the chassis, with the detriment of lower velocity and higher spread so it's not as effective at longer ranges. Remember to place your PPC shots accurately, don't just spray them indiscriminately or else their added damage is wasted.
This offers the best burst output on the Bushwacker. This has similar damage and heat to dual RAC5, but significantly improved accuracy due to the tighter spread and especially faster velocity.
One of the only IS mediums that can do quad AC2. While the Bushwacker's hitboxes are rather favourable for this loadout, the hardpoints do require exposing most of your mech all of the time.
BSW-X2
The X2 has the highest agility of the Bushwackers. It doesn't have enough hardpoints to bother running missiles, so ballistics is the way to go.
Okay DPS with pinpoint volleys. Unlike dual LB10, this requires XL, but the pinpoint nature allows you to engage at farther ranges, even 400m and beyond where UAC10 volleys tends to spread too much.
This build is the same on the BSW-P2.
Okay DPS with bonus crit damage. Unlike dual AC10, this doesn't necessarily require XL, so you can brawl somewhat freely.
This build is the same on the BSW-P2.
BSW-HR "HIGH ROLLER"
The hero runs a lot of the builds that are possible on other Bushwackers, while adding the C-Bill bonus. It is inferior for triple ballistics and energy, and it doesn't really have any unique builds of its own, but dual and single ballistic builds are all fair game.
The base camo pattern is based on the Bushwacker action figure by Tyco.
Precise brawler, if a bit warm. Raw alpha or DPS aren't impressive, but with careful pinpoint aim it can be surgical.
This build can also be done on the BSW-P2.
Closest thing we have to a laservomit Bushwacker - this is one of the only builds that can truly trade/poke. While the Bushwacker has a good frontal profile for trading, remember the XL and explosive gauss are especially vulnerable from flanking fire compared to other medium mechs.
Right-sided version of this build can be done on the BSW-P2.
While not the most impressive alpha size, the HGauss still guarantees a large chunk of damage always goes to one spot. Twist aggressively when not firing and abuse the Bushwacker's large side profile as a shield, since you're forced to take the STD engine.
This build can also be done on the BSW-P2, right-sided.
Offers the greatest RAC DPS you can achieve on the chassis, with the detriment of lower velocity and higher spread so it's not as effective at longer ranges. Remember to place your PPC shots accurately, don't just spray them indiscriminately or else their added damage is wasted.